Lo-FiX
CREATED BY
5:12
How to create click interactions | Editor X
How to create click interactions in Editor X
Have you ever wanted to create stunning, interactive designs using Editor X? Look no further! In this tutorial, we'll walk you through the process of creating click interactions within Editor X that will bring your web design projects to life. Not only will we guide you through every step of the way, but you will also learn how to build responsive designs that look great on any device. So, grab a cup of coffee or tea, and let's dive right in.
What is Editor X?
Editor X is a powerful web design platform that enables designers and developers to create beautifully crafted, intuitive websites with ease. It offers a range of tools and functionality out of the box, which allows you to create seamless and interactive user experiences for your audience. It is also packed with a variety of features and capabilities that enable you to create responsive designs, ensuring your content looks great on a wide range of devices and screen sizes.
Getting started with click interactions in Editor X
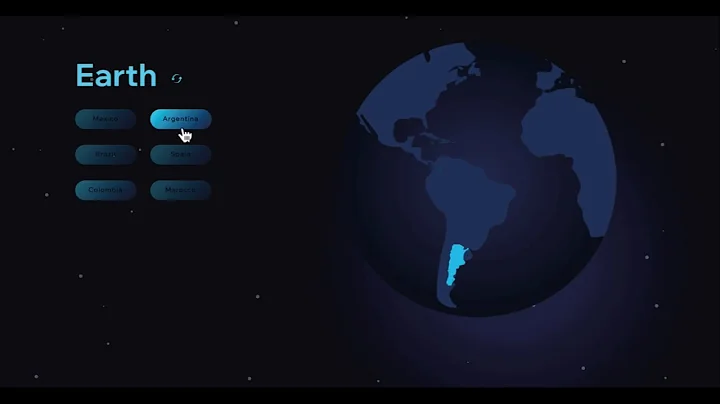
Click interactions are a fantastic way to add an element of surprise and delight to your designs. They can create a more dynamic and engaging experience for your users, enabling them to explore your content in new and exciting ways. In this tutorial, we'll be focusing on creating click interactions for hiding and revealing images on our website.
Step 1: Create a new section and add design elements
Start by creating a new section in your Editor X project, and add all the design elements you'll need for your click interactions. This includes images, buttons, and any other elements you'd like to include.
Step 2: Build a responsive design
To ensure your site looks great on any device, it's important to make your design responsive. In Editor X, you can easily do this by setting the element's value in percentages rather than fixed pixel values. This way, your elements will automatically adapt to the size of the viewport, making for a seamless and enjoyable experience on any screen.
Step 3: Organize and position design elements
Next, you want to organize your design elements into containers, and ensure they have the correct docking settings applied. Make sure elements are set to scale proportionally and that there are no minimum height values applied. This will ensure your design remains responsive and fluid across all devices.
Step 4: Add and style buttons
Now it's time to add buttons to your design, which will trigger the click interactions. You can customize the look and feel of your buttons to suit your design aesthetic, ensuring they blend seamlessly with the rest of your layout.
Step 5: Create custom effects and states for each image
Once your design is complete, you can start adding effects and states to your images. For each image, create a 'hide' state as the default and a 'show' state that will be triggered when the corresponding button is clicked.
To create a custom effect:
1. Select the image and go to the Inspector panel.
2. Select 'Interactions,' then 'Effect,' and finally 'Add a new custom effect.'
3. Name the effect and set up two states within it - the initial(hidden) state, and the effect state (show).
4. In the effect state (show), set the opacity to 100%.
5. In the initial state (hidden), set the opacity to 0%.
6. You can also add other transformations, such as scaling the image size (X and Y axis).
Repeat these steps for all the images in your design.
Make your web design skills shine with LiveLearning
Congratulations! You've successfully created click interactions in Editor X. However, this is just the tip of the iceberg when it comes to design capabilities in Editor X. If you're looking to level up your web design skills and explore the world of NoCode design, check out LiveLearning.
LiveLearning is an online platform that offers monthly NoCode design challenges with amazing prizes. By joining the LiveLearning community, you'll have access to expert mentoring for building design businesses and furthering your career in the NoCode space. Don't miss out on this opportunity to grow as a designer and learn from industry experts.
Wrapping up
In this tutorial, we've covered how to create click interactions in Editor X, including creating sections, adding design elements, building responsive designs, and customizing your own effects and states. With these skills, you can now create stunning and interactive websites that will engage your audience.
By participating in the LiveLearning community, you'll not only polish your NoCode design skills but also have the opportunity to network with fellow designers and learn from experts in the field. Don't miss out on this chance to unlock your full potential as a designer and join the world of NoCode design!


Join over 5,000+ people learning, helping each other to scale their freelance/design business, taking no-code challenges, collaborating, talking about their projects, and more!
Join Designers & Creatives From All Over The World!

More Like This #Tag
Brad Hussey | Freelancing As A Web Designer & Creating Online Courses That Sell (Passive Income)
Editor X TV | With Brandon Groce
1:12:35


